 Budget
Importing Bank Statements
Import transactions directly from your bank's exported files instead of entering them manually. The Budget app supports CSV, OFX, QIF and ISO 20022 camt.053 XML formats with automatic duplicate detection.
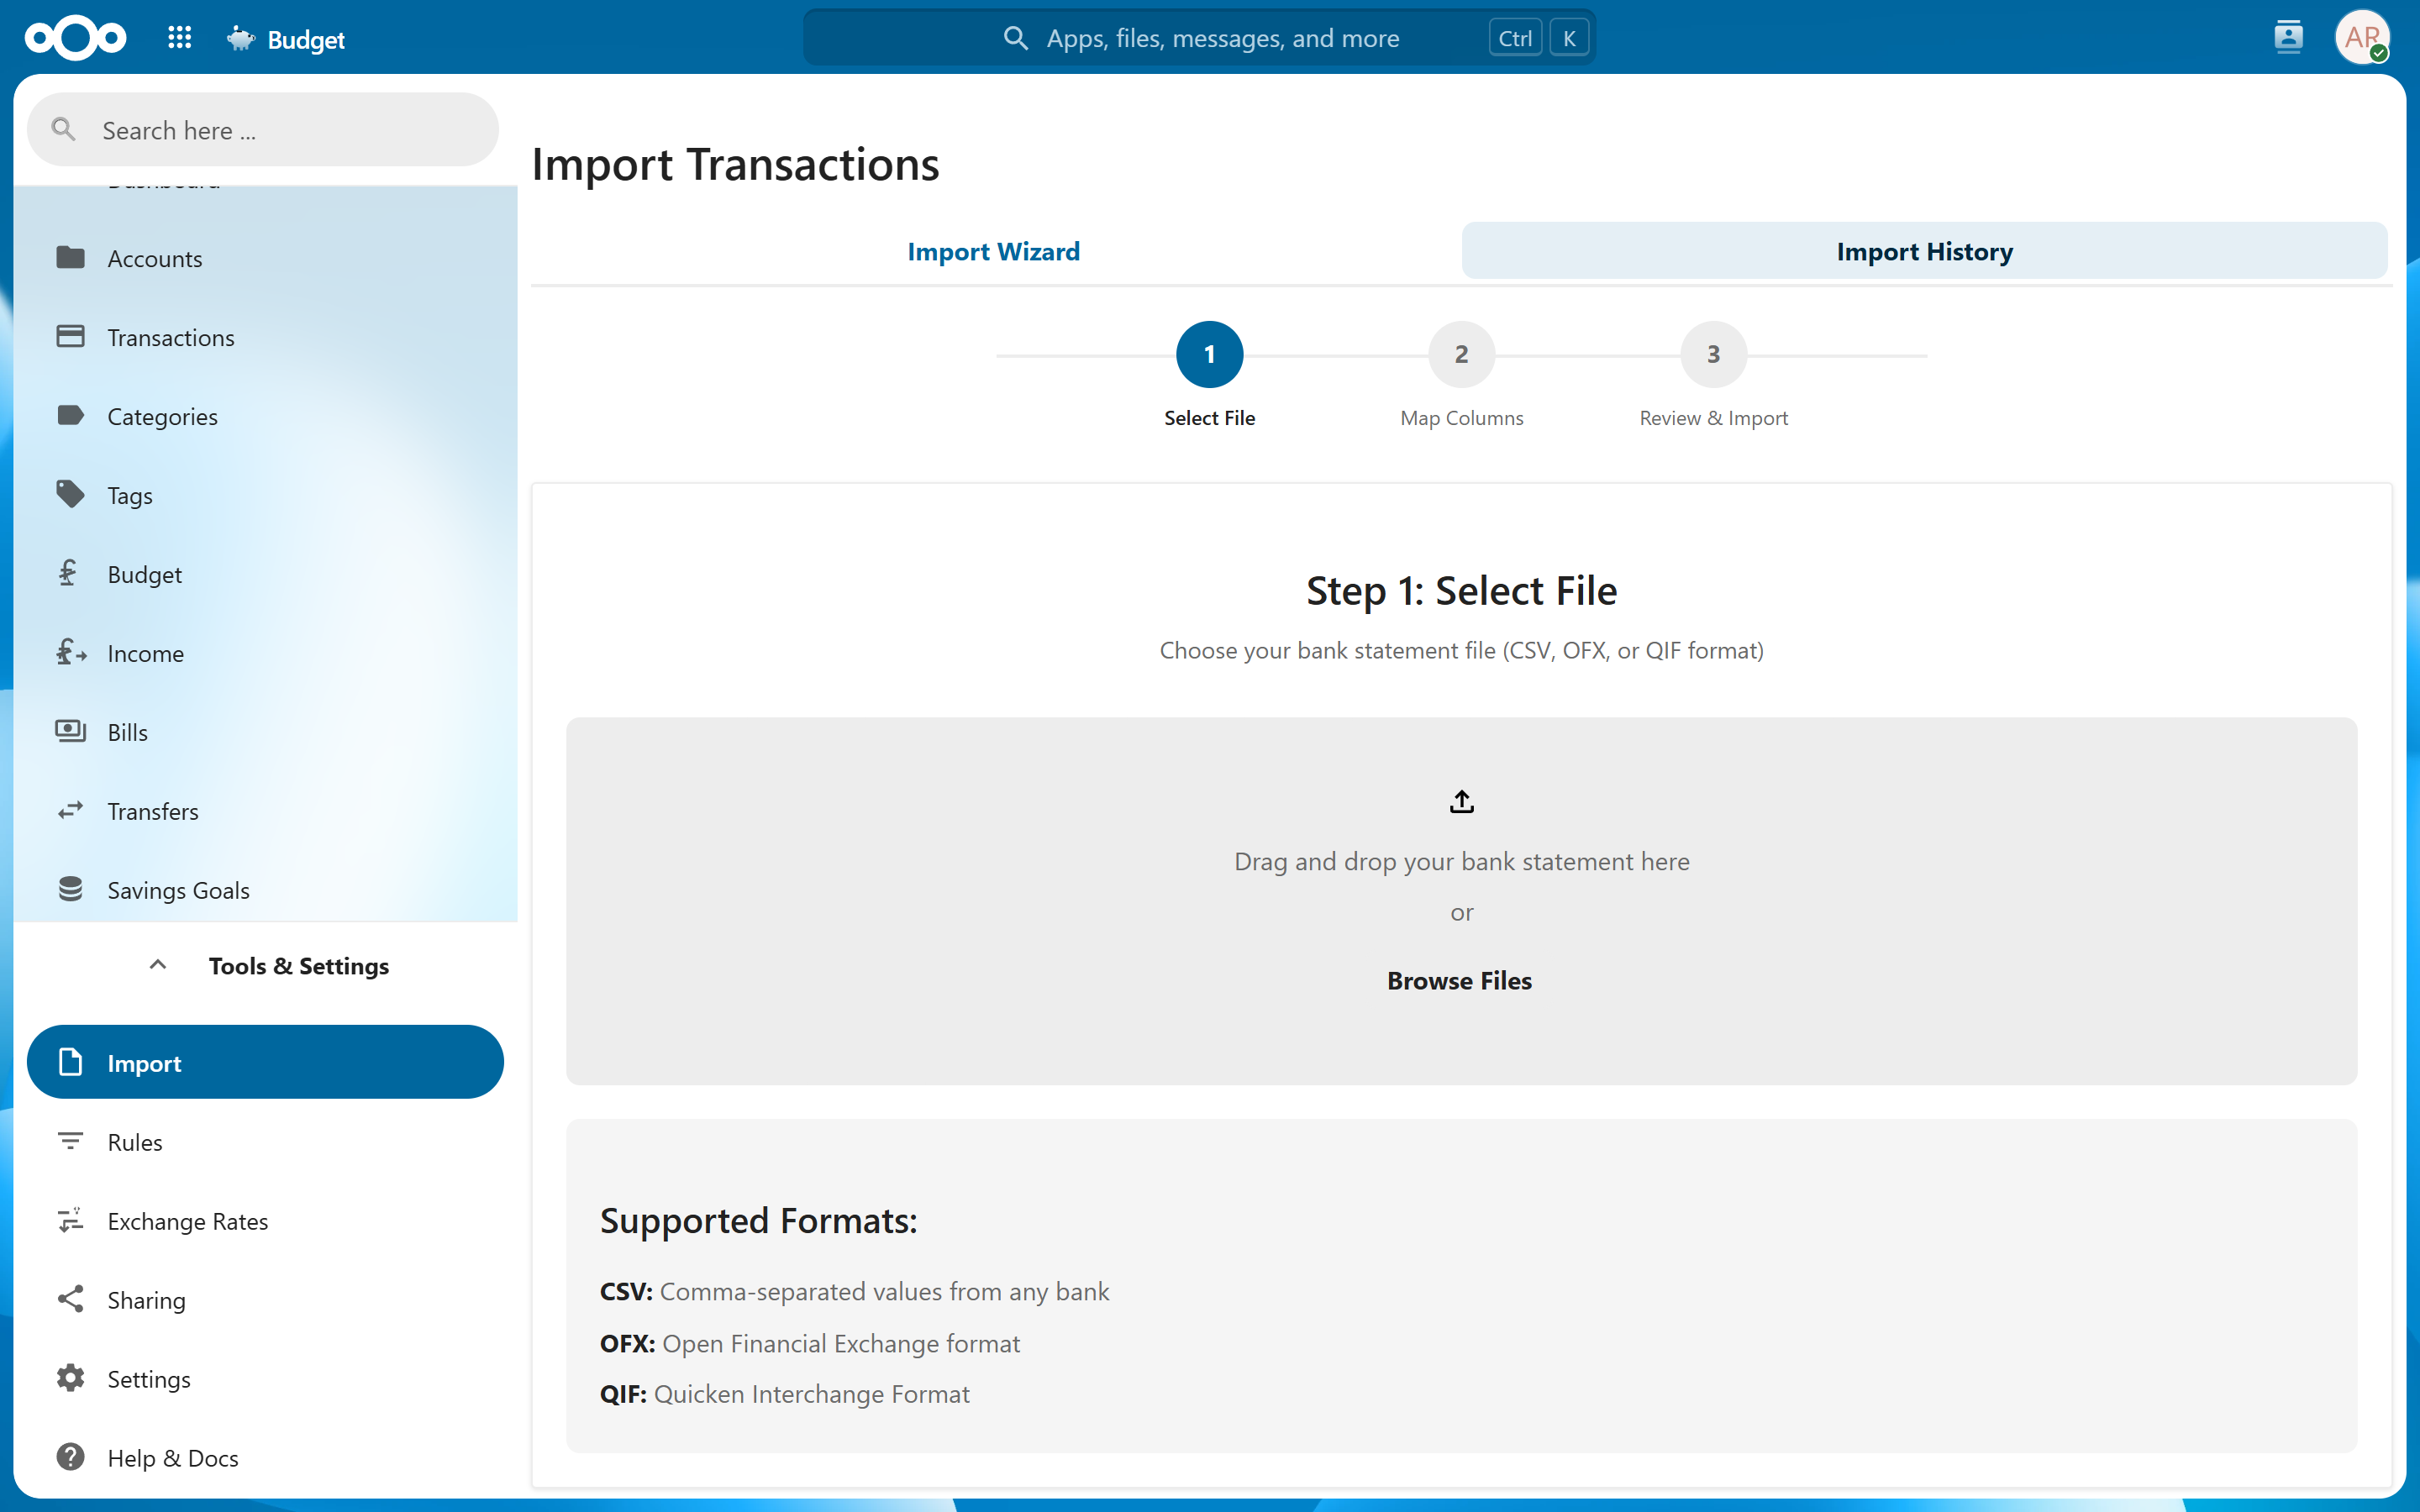
Supported Formats#
| Format | Best For | Notes |
|---|---|---|
| CSV | Most banks, custom exports | Most flexible; requires column mapping |
| OFX | US/Canadian banks, direct downloads | Fields are detected automatically; the text fields can be adjusted |
| QIF | Quicken exports, older software | Legacy format with basic field support |
| camt.053 XML | European banks (ISO 20022 statement export) | Accounts, balances and references detected automatically; see camt.053 Import |
Tip: If your bank offers multiple export formats, OFX is usually the easiest since its fields are detected for you. Use CSV when you need full control over how fields are interpreted.
CSV Import Step-by-Step#
CSV is the most flexible import format. The import process walks you through uploading, mapping, previewing, and executing the import.
1. Upload Your File#
Navigate to Import > Upload File and select your CSV file. If the file has no header row, untick Skip first row (headers) on the mapping screen; the preview redraws straight away with the first row as data and the columns named by position.
Note: The app automatically detects and converts common non-UTF-8 encodings (ISO-8859-1, Windows-1252, and ISO-8859-15) to UTF-8. In most cases no manual conversion is needed. If special characters still appear incorrectly, re-save your file as UTF-8 from your spreadsheet application.
2. Delimiter and Character Encoding#
The app automatically detects whether your file uses commas, semicolons, or tabs as delimiters. The detected delimiter is shown in the preview. If the detection is wrong, pick the right one and the columns and preview redraw immediately, so you can check the split before mapping anything.
Tip: European bank exports commonly use semicolons as delimiters since commas are used as decimal separators in those regions.
Character encoding#
Next to the delimiter is a Character Encoding picker, set to Detect automatically by default. It names the encoding it settled on in the hint beneath it.
Detection is reliable for Unicode (UTF-8) files, and for OFX and camt.053 files, which state their encoding in the file itself. It cannot be reliable for everything else: older single-byte encodings accept every possible byte, so a Cyrillic file and a Western European one are genuinely indistinguishable from their contents alone. When the app has to guess, it assumes Western European.
You will know the guess was wrong because the preview below shows mojibake — Äàòà where you expected Дата, or Café where you expected Café. Pick the right encoding from the list and the columns and preview redraw immediately. The options cover Unicode, Western and Central European, Cyrillic, Greek, Turkish, Hebrew, Japanese, Chinese and Korean.
The picker applies to every format, not just CSV, and your choice is used for the actual import as well as the preview — so what you see is what you get.
Tip: If only some characters look wrong — curly quotes or a euro sign showing as gibberish while the rest reads fine — the file is most likely Western European and no change is needed. Whole words of nonsense mean the encoding is genuinely wrong.
3. Column Mapping#
Map each column in your CSV to the corresponding transaction field:
| Field | Required | Description |
|---|---|---|
| Date | Yes | Transaction date |
| Amount | Yes (unless using dual columns) | Transaction amount |
| Income Amount | No | Separate column for credits/deposits |
| Expense Amount | No | Separate column for debits/withdrawals |
| Description | No | Transaction description or memo |
| Notes | No | Column stored in the transaction's notes field |
| Type | No | Whether the row is income or an expense (see below) |
| Vendor | No | Payee or merchant name |
| Reference | No | Check number or reference ID |
| Category | No | Category name; categories are auto-created if they do not exist |
| Account | No | Account name; accounts are auto-created with inferred types |
| Currency | No | Currency code for the transaction |
Select the appropriate column header for each field. Columns you do not map are ignored.
Description, Notes, Vendor and Reference accept more than one column. Tick every column that belongs in the field and the values are joined with a comma, in the order the columns appear in the file; blank cells are skipped. A bank that exports a merchant column and a separate details column can have both in the description, for example Tesco, Weekly groceries. The same applies to those four fields for OFX, QIF and camt files, and a saved import template keeps the whole selection.
If your bank export carries extra transaction information that does not belong in the description, map that column to Notes and it is kept on the transaction rather than discarded. Notes appear as their own column in the import preview whenever something is mapped into them, so you can check the right column was picked before anything is written.
Very long values are truncated to what the field can hold: 1,000 characters for the description, 2,000 for notes, 255 for the vendor and 100 for the reference.
How a negative amount is written#
Exports disagree about how to write a negative, so Budget reads all the usual notations. Every one of these is an expense of 1,234.56:
| Notation | Example |
|---|---|
| Leading minus | -1234.56 |
| Trailing minus | 1234.56- |
| Brackets (the accounting convention) | (1234.56) |
| A typographic minus or dash instead of a hyphen | −1234.56 |
Currency symbols, spaces and thousands separators around the number are ignored, so -€1.234,56 and ($1,234.56) are read the same way. A lone - in an amount column means "nothing here" and is read as zero, not as a negative.
Type Column#
Budget needs to know which way each row goes. By default it reads the sign of the amount: negative is an expense, positive is income.
Plenty of exports do not sign their amounts — they write every value as a positive number and put the direction in a separate column instead. Nextcloud Tables does this, and so do several banks and budgeting apps. Map that column to Type and it decides the direction, overriding the sign.
Recognized values (case and surrounding punctuation are ignored):
| Means income | Means expense |
|---|---|
Income, Credit, CR, C, Deposit, Refund, In | Expense, Debit, DR, D, Withdrawal, Payment, Purchase, Out |
Rows where the Type column is blank or holds something not on this list fall back to the sign of the amount, and the preview tells you how many rows that applies to.
Tip: If your amounts are all positive and you do not map a Type column, every row is imported as income. The preview warns you when a batch is about to go in almost entirely one way while the account it is going into leans the other way — check that warning before confirming.
Category Column#
When you map a column to Category, the app automatically creates any categories that do not already exist. Imported transactions are assigned to the matching category by name. This is useful when your bank export or finance app includes category information.
An import rule that sets a category comes first: the column only names the category for rows that no rule has categorized. The preview shows the category each row will end up with, whichever of the two it comes from, and counts both under Auto-categorized.
Account and Currency Columns#
Mapping an Account column lets you import transactions across multiple accounts from a single file. Accounts that do not already exist are auto-created with types inferred from the account name (e.g., names containing "Cash" default to the cash type, "Investment" to the investment type, and so on) and in your default currency, unless a mapped Currency column says otherwise. The Currency column sets the currency for each transaction and is especially useful alongside the Account column for multi-currency imports.
Two things to know about the Account column:
- A row whose account cell is blank goes to the account chosen under Account for rows without one on the preview step (the same select that is otherwise the import's destination). It is not dropped, and it does not create an account. Leave that select empty and such rows are skipped. The preview tells you before you import, above the statistics: how many of the file's rows will not be imported, why, and which rows they are, along with a reminder that choosing an account in that select is what brings them back. Pick one and the warning clears and those rows rejoin the count.
- Only a row that would import as a transaction can name an account. If the file's header line is read as data (see skip first row), its account cell holds the column title — "Account:" or similar — and that used to become a real account. It no longer does; the row simply fails with a clear reason.
A row that names an account which cannot be resolved is reported rather than guessed at, since filing it under the wrong account would be worse than skipping it.
Because one account is created for every distinct value in that column, mapping the wrong column here is expensive: map the date column and you get one account per date. The preview warns you before that happens. Above five new accounts it shows how many the import would create, above the statistics where you cannot miss it, and if most of the new names look like dates it says so and points you back at the column mapping. It is a warning, not a block -- a file that genuinely spans a dozen accounts imports normally.
If an import does go in with the wrong column mapped, the accounts it created can be removed together from the Accounts page rather than one at a time -- see Deleting several at once.
4. Dual-Column Amount Mapping#
Some banks, particularly European ones, export income and expenses in two separate columns rather than using positive and negative values in a single column.
If your file uses this format, map the Income Amount and Expense Amount columns individually instead of mapping a single Amount column.
Warning: You must map either a single Amount column or the Income Amount and Expense Amount pair. Mapping both at the same time is not allowed and will display a validation error.
5. European Number Format#
If your bank uses European number formatting (e.g., 1.234,56 instead of 1,234.56), enable the European number format toggle during column mapping. This tells the app to interpret periods as thousands separators and commas as decimal separators.
6. Preview#
After mapping your columns, click Preview to see a table of parsed transactions before anything is written to the database. Review the preview carefully:
- Verify dates are parsed correctly
- Confirm amounts have the right sign — expenses are shown in red with a minus, income in green without one
- Check that descriptions and vendors look right
Rows that match a transaction already in the account are flagged with a Duplicate badge. They are shown for review but skipped when you import — see Duplicate Detection. The Show duplicates and Show uncategorized checkboxes only filter what the preview displays; they do not change what is imported.
A row the import cannot take at all is not in that table, so the preview counts those separately, above the summary: how many of the file's rows will not be imported, the reason for each one and the rows it applies to. The summary counts what will be imported, not what will not, so this is the only place a dropped row shows up before it is too late to do anything about it. The commonest reason is a blank account cell with no fallback account chosen, and the warning says so and points at the select that fixes it (see Account and Currency Columns).
The preview also warns, above the summary, when the direction looks doubtful:
- Rows with no usable transaction type — you mapped a Type column but some rows are blank or hold a value Budget does not recognize. Those rows fall back to the sign of the amount.
- A batch heading the wrong way — nearly every row would be added as income into an account whose history is nearly all expenses (or the other way round). This usually means the Type column is unmapped, so check the mapping before importing.
It also says when rows have no description: how many, and which rows they are. Description has to be mapped, but a file can still leave the cell empty on some rows. Those rows are imported all the same, however an import rule that matches on the description has nothing to match, so they come through uncategorized. If the cells should not be empty, the file is the place to look: an export that shows a value on screen does not always write it to the CSV. A row whose description is filled in by a Set Description rule is not counted.
None of these warnings block the import; they are there to catch a mapping mistake before it reaches your balances.
Tip: If something looks wrong in the preview, go back and adjust your column mapping or delimiter settings. No data is saved until you execute the import.
7. Execute Import#
When the preview looks correct, click Execute Import to save the transactions to your selected account. The app reports how many transactions were imported and how many were skipped as duplicates.
If some rows could not be imported, a window opens listing why, one line per reason with the row numbers it applies to — so a file where fourteen rows have the same problem reads as one problem, not fourteen. The usual causes are a date the app could not read, an amount that is not a number, or an account name that does not exist. Fix the file (or the mapping) and import again; the rows that did import are not duplicated, because they are recognised as already present.
camt.053 Import#
camt.053 is the ISO 20022 bank-to-customer statement — the XML export offered by many European banks, and the standard one in Switzerland. Intraday camt.052 account reports import the same way. Upload the .xml file on the Import page.
- Accounts are recognised by IBAN. Each statement in the file lists its account; if one of your Budget accounts carries the same IBAN it is matched automatically, otherwise pick the destination (the routing is remembered for next time).
- Descriptions come from the richest field available: the remittance text the payer wrote, then the counterparty name, then the bank's own entry text. The counterparty is also filled into the Vendor field, and the bank's entry text into Notes when it adds anything.
- Batch entries are expanded. A collective booking that carries several transaction details (a salary run, a card settlement) becomes one transaction per detail, each with its own counterparty and amount.
- Duplicates are detected by the bank's entry reference, which survives re-downloads and overlapping statement periods. If a bank stamps the same reference on every entry, the importer falls back to matching on date, amount and description instead.
Note: As with OFX, the date, amount and type are always taken from the file's own structure; only the text fields (description, vendor, notes, reference) can be remapped.
OFX Import#
OFX (Open Financial Exchange) files are structured financial data files that many banks offer as a download option, sometimes labeled as "Microsoft Money" or "Quicken" format.
- Navigate to Import > Upload File and select your
.ofxfile - The app parses the file automatically and fills in the field mapping for you
- If the file contains an account identifier, the app attempts to match it to one of your existing accounts
- Review the parsed transactions in the Preview step
- Click Execute Import to save
Note: OFX files contain standardized field names, so the date, amount, and type are always taken from the file's own structure and cannot be remapped.
Choosing which OFX field becomes the description#
An OFX transaction carries two pieces of text: a name and a memo. Most banks put the payee in the name, so that is what the app uses by default, and the memo is kept in the transaction's notes.
Some banks do the opposite and put the useful text in the memo. In the mapping
step, set Description to memo and the app will use that instead. The
available fields for OFX are:
| Field | Default source | Notes |
|---|---|---|
| Description | description (the OFX name) | Falls back to the memo when the name is empty |
| Notes | memo | Left empty when the memo is already the description |
| Vendor | description (the OFX name) | |
| Reference | reference | Falls back to the bank's transaction ID |
Note: Changing the mapping only affects transactions you import from then on; it does not rewrite transactions you have already imported. Re-importing the same statement will not update them either, because duplicate detection recognises them as already imported. Delete them first if you want them re-created with the new mapping.
QIF Import#
QIF (Quicken Interchange Format) is a legacy format still exported by some banks and financial software.
- Navigate to Import > Upload File and select your
.qiffile - Adjust the field mapping if you want different text in the description or notes
- Route each account in the file to one of your accounts
- Review the preview and click Execute Import
A QIF file often holds several accounts, and can also contain your category list and other non-transaction sections. Only the accounts are offered for import; everything else is ignored.
QIF fields#
Accounts are identified by the name in the file. A file that does not name its accounts shows them as Account 1, Account 2 and so on, in the order they appear.
| Field | Default source | Notes |
|---|---|---|
| Description | description | The payee line |
| Notes | memo | Left empty when the memo is already the description |
| Vendor | description | |
| Reference | reference | The check number |
As with OFX, the date, amount and type come from the file's structure and cannot be remapped.
Tip: QIF has limited field support compared to OFX and CSV. If your bank offers OFX as an alternative, prefer that format for more complete data.
Import Presets (App-Specific Import)#
Import presets provide one-click column mapping for exports from other finance apps. When you select a preset, the app knows exactly which columns to expect, so the column mapping step is skipped entirely.
Flow: Upload CSV → Select preset from the Import Format dropdown → Preview → Execute Import.
Presets handle format details like date patterns, number formats, and special columns automatically. If your source app is supported, using the preset is always easier than manual CSV mapping.
Toshl Finance#
To import from Toshl Finance, export your data as CSV from Toshl and upload the file in the Budget app. Then select Toshl Finance from the Import Format dropdown.
Key features of the Toshl preset:
- Language-independent — Works regardless of the language Toshl used for the export. Column detection is based on position, not header names.
- Date and number handling — Automatically parses European-style dates (
DD.MM.YY) and comma-decimal amounts (1.234,56). - Multi-currency support — When a transaction is in a foreign currency, the preset uses the converted amount from Toshl's "In Main Currency" column, so all imported amounts are in your main currency.
- Category auto-creation — Categories from Toshl's Category column are created automatically if they do not already exist in Budget.
- Tag set integration — Tags from Toshl are imported as tag sets attached to the corresponding category. This preserves your Toshl tagging structure.
- Account auto-creation — Accounts from Toshl's Account column are created automatically. Account types are inferred from the name (e.g., "Cash" becomes a cash account, "Investment" becomes an investment account).
- Transfer handling — Rows where Toshl's Category is "transaction" (inter-account transfers) are skipped automatically since transfers are not regular transactions.
- Full preview — Before executing, the preview shows accounts to create, categories to create, tags to import, and transfer rows that will be skipped.
Saved Import Templates#
If you import from the same bank regularly, you can save your import configuration as a reusable template instead of repeating the setup on every import. Templates are private to your account, and what a template stores depends on the file format:
- CSV — the column mapping, the CSV delimiter, the "skip first row" option, and the character encoding if you picked one by hand (plus an optional default destination account).
- OFX / QIF — the account routing, i.e. which destination account each source account in the file maps to, together with the Description / Notes / Vendor / Reference mapping if you changed it from the defaults.
All templates also remember the import options (skip duplicates, apply rules). When you upload a file, only templates matching that file's format are offered.
CSV: saving a column mapping#
- Upload a CSV file and map the columns as usual (see Column Mapping).
- Click Save mapping as template… in the column mapping step.
- Give the template a name (for example, My Bank Checking) and save it.
To reuse it, upload a CSV file and pick your template from the My Templates group in the Import Format dropdown. The column mapping is filled in automatically, and the preview redraws under the template's delimiter, header setting and encoding. A template saved without an encoding leaves the encoding picker as it is. You can still tweak any column before previewing — adjusting a mapping switches the import back to a custom mapping for that run, leaving the saved template unchanged.
Note: A CSV template stores column names, so it works on any future export from the same bank as long as the column headers stay the same. If your bank changes its export format, save a new template.
OFX / QIF: saving account routing#
OFX and QIF fields are standardized, so their mapping is filled in for you and rarely needs saving. What is repetitive is routing: a single file can contain several accounts, and each import you re-pick which of your accounts each one maps to.
- Upload an OFX or QIF file and reach the Review & Import step.
- In Map Source Accounts to Destination Accounts, set each source account's destination.
- Click Save routing as template… above the list and name it.
To reuse it, upload a file of the same format and pick your template from the Saved Account Routing dropdown; the destinations are filled in automatically. You can still change any destination before importing.
If you changed the Description / Notes / Vendor / Reference mapping before saving, that is stored with the routing and restored alongside it, so a bank that puts the payee in the memo does not have to be re-mapped on every import.
Note: OFX already auto-matches source accounts to your accounts by account number; a saved routing template is most useful for QIF (which has no auto-match) or when the auto-match is wrong or incomplete.
Automatic routing memory#
You don't have to save a named template to benefit from routing memory. After any OFX/QIF import, the app quietly remembers which destination account each source account was routed to. The next time you import a file of the same format, those destinations are pre-filled automatically — including for QIF, which has no other auto-matching. If you route a source account somewhere different, the new choice is remembered instead. This works alongside named templates: selecting a template still takes precedence, and you can always change any destination before importing.
Managing templates#
Click Manage templates (in the column-mapping step for CSV, or above the account-routing list for OFX/QIF) to rename or delete your saved templates. Each is labelled with its format.
Duplicate Detection#
The app automatically checks for duplicate transactions during import. A transaction is considered a duplicate when it matches an existing transaction in the same account on all of the following:
- Date
- Amount
- Description
- Reference (if mapped)
Duplicates are skipped during import and reported in the results summary. This makes it safe to import overlapping date ranges without creating duplicate entries.
Detection is occurrence-aware: if one file legitimately contains several identical rows (e.g. two same-priced coffees on the same day), they all import as distinct transactions — and re-importing the same statement still skips every one of them. Re-importing an older statement also recovers any rows that earlier versions mis-flagged as duplicates.
To deliberately import rows that are flagged as duplicates (for example, genuinely repeated payments your bank exported without a unique reference), tick Import flagged duplicates too in the preview step. The option applies to the whole batch and resets for every new import; saved import templates can also store it.
Note: Duplicate detection is based on exact matching. If your bank changes the description text between exports, the same transaction may not be recognized as a duplicate. If your export has a unique sequence number per transaction, map it to the Reference column — it is stored on each transaction and makes duplicate detection exact. (OFX imports use the bank's own unique transaction IDs automatically.)
Rolling Back an Import#
If you imported transactions by mistake or with incorrect settings, you can undo the entire import:
- Navigate to Import
- Find the import in your import history
- Click Rollback to delete all transactions that were created by that import
Rolling back removes only the transactions from that specific import. Transactions you entered manually or imported separately are not affected.
Warning: If you have edited any imported transactions (changed categories, amounts, etc.) since the import, those edits will be lost when you roll back.
Tips#
- The first row of a CSV file must contain column headers. Files without headers cannot be mapped correctly.
- CSV encoding is auto-detected for common Western encodings (ISO-8859-1, Windows-1252, ISO-8859-15). For other encodings, save as UTF-8 before importing.
- For large imports, the preview shows a sample of rows. Scroll through to verify different transaction types are parsed correctly.
- Import into the correct account before clicking Execute Import -- transactions cannot be moved between accounts after import.
- Use Import Rules to automatically categorize transactions after import, saving you from manually categorizing each one.
Related Features#
- Import Rules -- Create rules to auto-categorize imported transactions by matching description or vendor patterns
- Transactions -- View, edit, and manage all your transactions including imported ones
- Accounts -- Set up accounts that correspond to your bank accounts before importing
Settings#
- Auto-apply import rules -- When enabled, import rules are applied automatically to new transactions during import. Disable this if you prefer to review transactions before categorizing.
- Import flagged duplicates too -- Per-import option in the preview step. Off by default, so flagged duplicates are skipped unless you explicitly opt in.