 Budget
Import Rules
Auto-categorize imported transactions using pattern-based rules with a visual query builder, so you spend less time manually sorting transactions and more time understanding your finances.
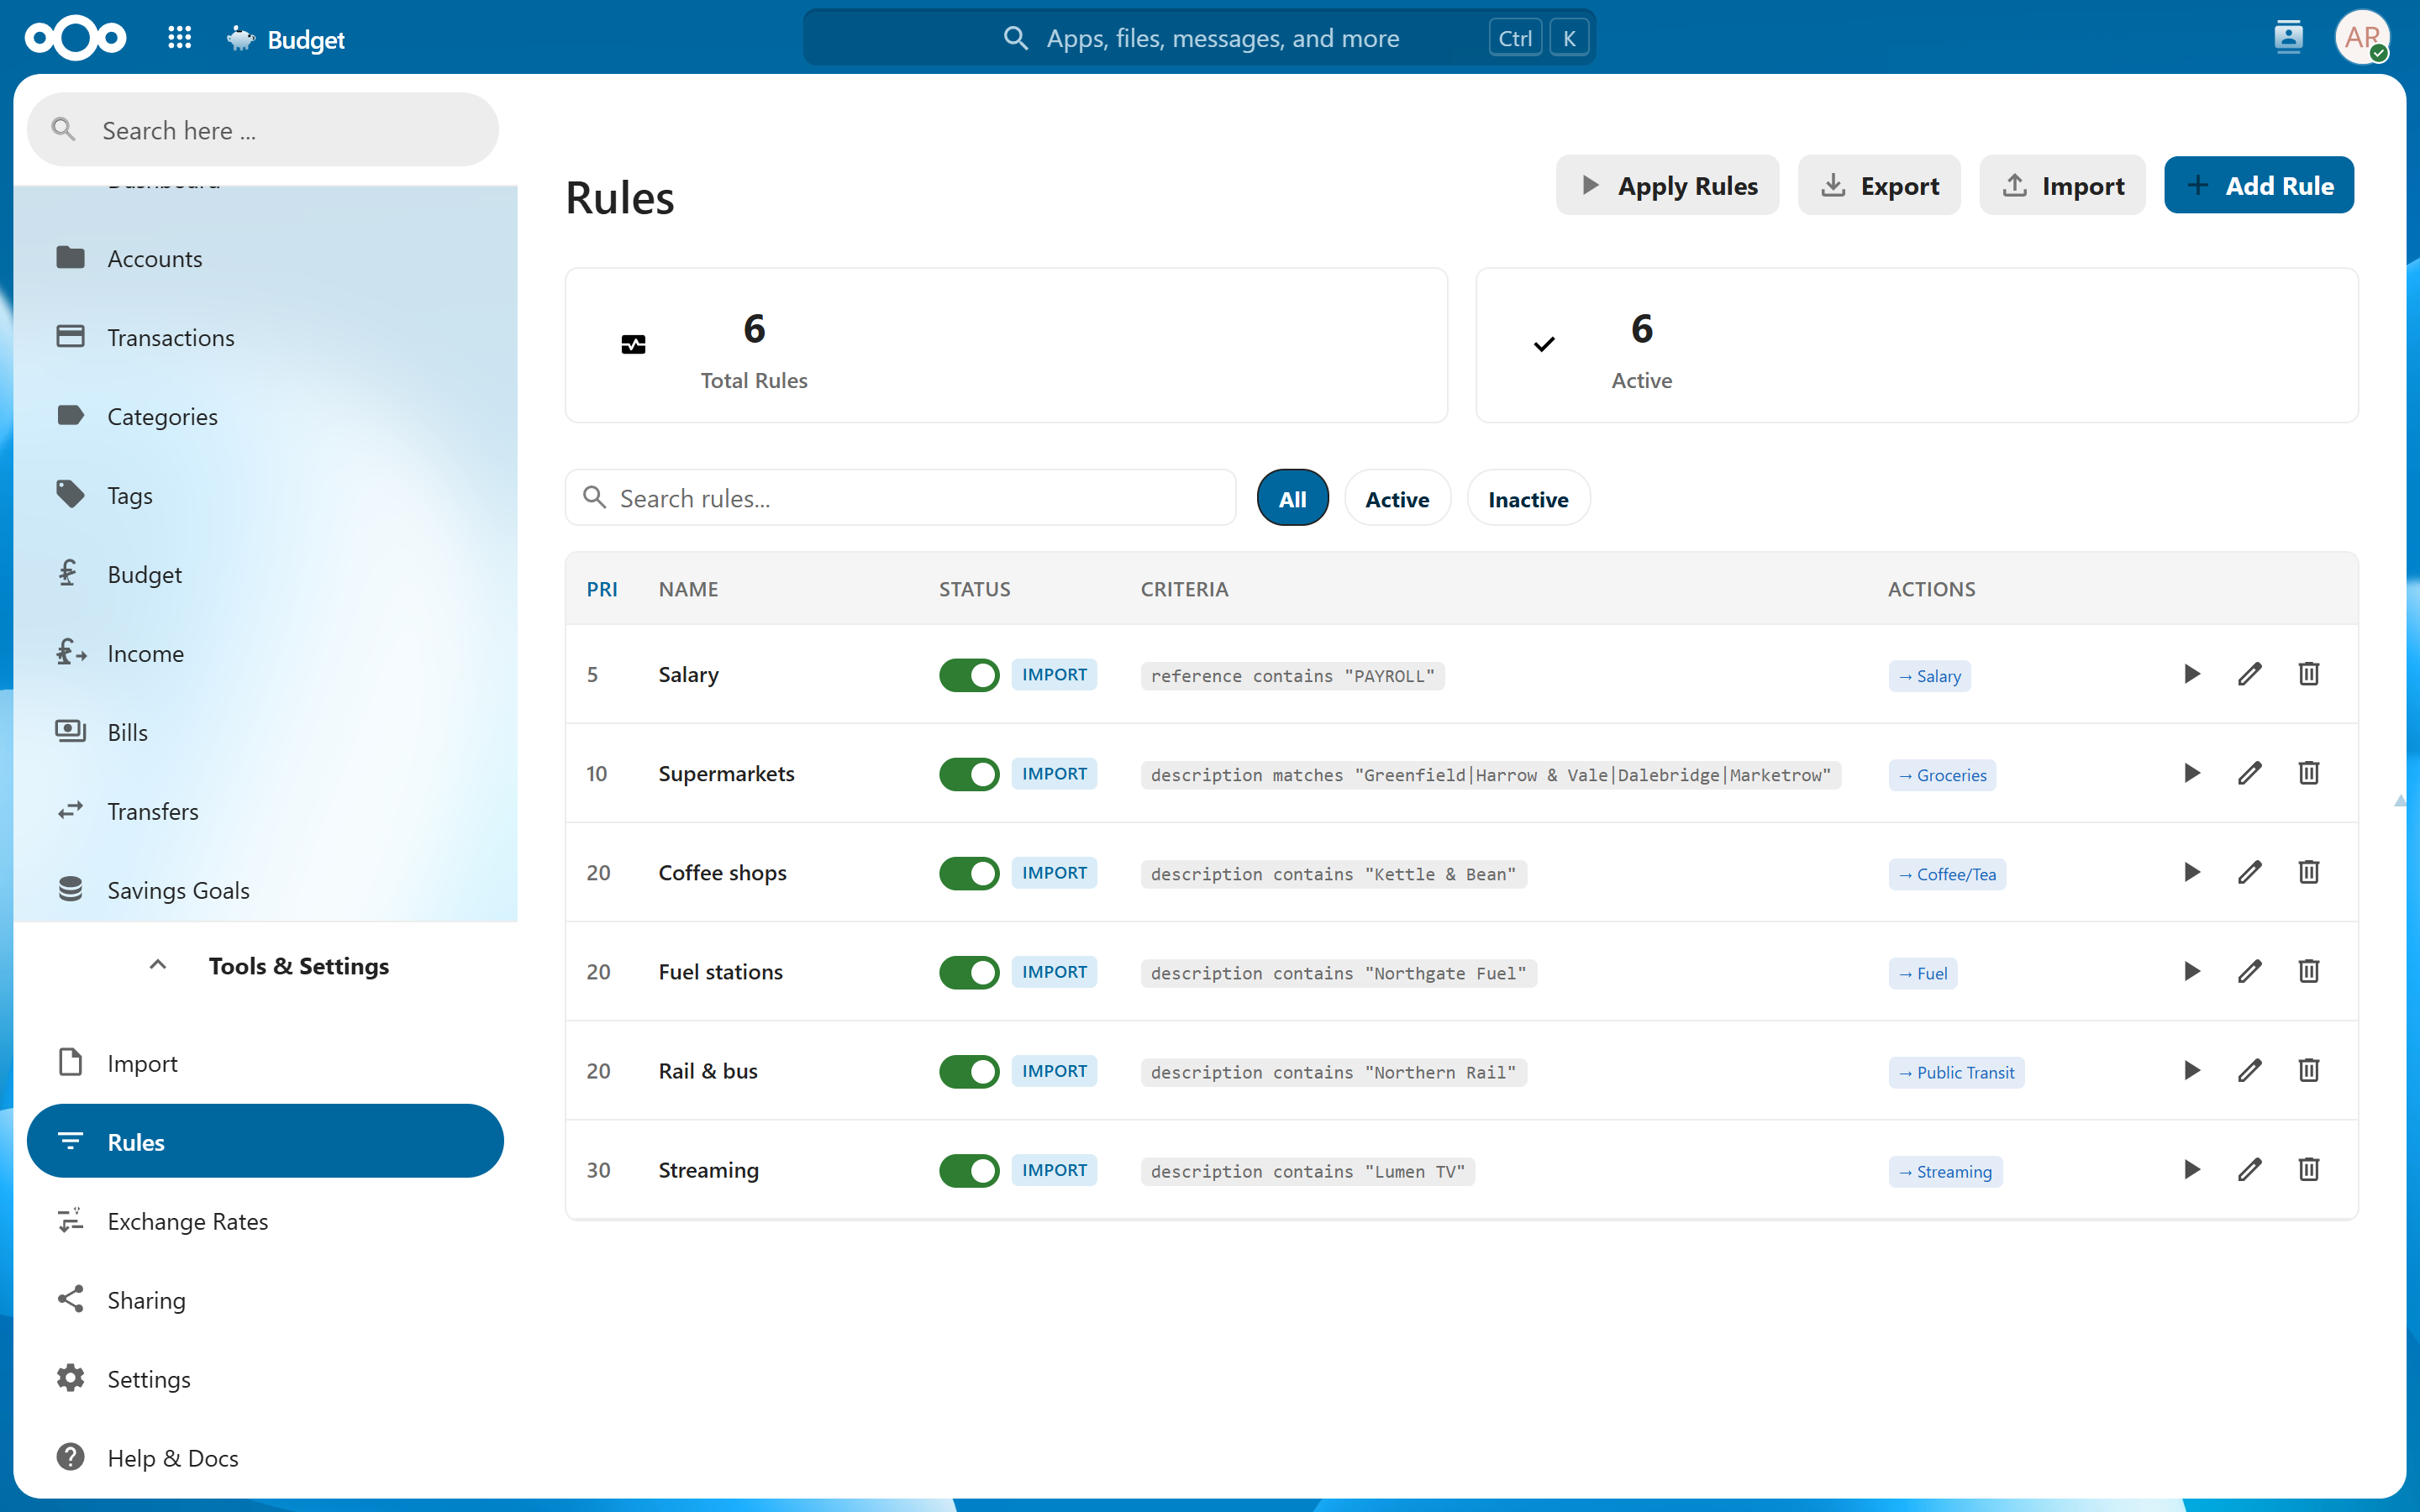
Overview#
Import Rules let you define conditions that automatically assign categories, tags, vendors, and other fields to transactions as they are imported. Rules use a visual query builder with boolean logic, support multiple actions per rule, and can be previewed or applied retroactively to existing transactions.
Creating a Rule#
- Navigate to Budget > Rules
- Click Add Rule
- Give the rule a descriptive name (e.g., "Amazon purchases", "Monthly rent")
Building Criteria#
Each criterion consists of three parts:
| Component | Options |
|---|---|
| Field | Description, Vendor, Amount, Date, Reference, Notes, Transaction Type, Account, Account Type, Import Source |
| Match type | Contains, Equals, Starts with, Ends with, Regex, Greater than, Less than |
| Pattern | The value to match against |
Tip: Use "Contains" for most text matching. Reserve "Regex" for complex patterns where simpler match types won't suffice.
The Transaction Type field lets you filter by Income or Expense. This is useful when the same description appears as both inflow and outflow (e.g., internal transfers between accounts).
The Import Source field matches how a transaction arrived. The value is one of a fixed set of labels the importer writes, so the pattern must match one of them exactly: CSV Import, OFX Import, QIF Import, Bank Sync, or Toshl for the Toshl preset. Use it to categorize differently depending on where the data came from — for example, treating bank-sync rows as already reconciled.
Note: The source is only known while a transaction is being imported. It is not stored on the transaction afterwards, so an Import Source condition never matches when you run a rule over existing transactions — see Run on Existing Transactions.
The Account field scopes a rule to one of your accounts — pick the account from the dropdown and the rule only fires for transactions in it. Combine it with a NOT to mean "any account except this one." The related Account Type field matches by kind of account (Checking, Savings, Credit Card, and so on) rather than a specific one — handy for rules like "only on credit-card accounts." Both match when you run a rule over existing transactions and when importing into that account.
Boolean Logic#
Combine multiple conditions using logical operators:
- AND — all conditions must be true
- OR — at least one condition must be true
- NOT — negate a condition or group
Groups can be nested to unlimited depth for complex logic. For example:
(vendor contains "Amazon" AND amount > 50)
OR
(description contains "Prime")
This matches any Amazon purchase over £50, or any transaction mentioning "Prime" regardless of vendor or amount.
Actions#
When a rule matches a transaction, one or more actions are applied:
| Action | Effect |
|---|---|
| Set category | Assign a specific category |
| Set vendor | Set the vendor/payee field |
| Set description | Replace the description, always or only when it is empty |
| Set notes | Add or replace notes |
| Add tags | Attach tags from your tag sets |
| Set account | Assign to a specific account |
| Set type | Mark as expense or income |
| Set reference | Set the reference field |
| Exclude from Forecast | Mark the transaction as extraordinary so it stays out of forecast projections |
| Auto-Link as Transfer | Find and link a matching opposite transaction as a transfer |
You can configure multiple actions per rule — for example, set the category to "Subscriptions" and add a "streaming" tag simultaneously.
Set description is handy for turning a bank's raw text, such as CARD PAYMENT TO TESCO STORES 2231, into something readable. Duplicate detection still uses the description from the original file, so importing the same statement again is still recognised after a rule has rewritten it.
Note: Set category is the one action that skips split transactions. A split’s categories live on its parts, so its own is deliberately empty and a rule leaves it that way — during import, when you run a rule, and when you run a whole group. Every other action still applies to a split.
Auto-Link as Transfer#
The Auto-Link as Transfer action automatically finds a matching transaction on a different account — same amount, opposite type (income vs expense), within a few days — and links the two as a transfer. This is particularly useful for banks that represent internal movements as separate income/expense entries (e.g., Monzo pot transfers).
Example rule for automatic transfer linking:
- Criteria: Transaction Type is Expense AND Description contains "Pot Transfer"
- Action: Auto-Link as Transfer
This works when applying rules manually, during file import, and during bank sync.
Priority#
Each rule has a priority number. Higher priority numbers run first. When multiple rules match the same transaction, the highest-priority rule wins for any conflicting actions.
Tip: Use priority strategically — give specific rules (e.g., "Netflix subscription") a higher priority than general rules (e.g., "All entertainment vendors").
Behavior Settings#
Control how actions interact with existing field values:
| Behavior | Effect |
|---|---|
| Always | Overwrite existing value |
| If empty | Only set the field if it is currently blank |
| Append | Add to the existing value (text fields) |
| Merge | Combine with existing values (for tags) |
Note: "If empty" is useful when you want manual categorization to take precedence over rules.
Preview Matches#
Before saving a rule, click Preview to see which existing transactions in your account would match the criteria. This lets you verify the rule behaves as expected without making any changes.
Tip: If the preview shows unexpected matches, refine your criteria — add more conditions or switch to a more specific match type.
Run on Existing Transactions#
Rules normally apply during import, but you can also apply them retroactively:
- Open the rule you want to apply
- Click Run Rule Now
- Optionally restrict to uncategorized transactions only
- Confirm to apply
Warning: Running a rule with "Always" behavior on existing transactions will overwrite any manual categorization you've previously done on matching transactions.
Note: A rule never sets a category on a split transaction, whichever way this option is set. A split has no category of its own — the categories sit on its parts — so writing one onto the whole transaction would count its spending twice. Every other action still applies, so a rule can still set a split's vendor, notes or tags. Splits are shown as Split in the preview and results rather than as uncategorized.
Note: A rule whose criteria include Import Source will not match anything here. The source describes how a transaction arrived and is not kept on the transaction, so it is only available while an import is running.
If a split of yours shows a category: earlier versions let a rule run write one onto a split, leaving a transaction that claims a category while still carrying its own breakdown. Settings › Repair Data finds them — run Scan for Issues and look for Split Transactions Carrying a Category. It clears just the stray category; the transaction stays a split and its parts are untouched.
Editing a Rule as JSON#
Every rule can be edited as raw JSON instead of clicking through the visual builder — useful for power users who prefer to type, and for copying a rule between instances.
At the top of the rule editor, switch from Builder to JSON. The current rule is shown as an editable JSON document (its criteria, actions, and settings). Edit it freely, or paste a rule copied from elsewhere, then:
- Save — the JSON is checked when you save; if the structure is wrong (an unknown field, an invalid match type, a missing category) the error is shown so you can fix it. Switching back to Builder first re-parses the JSON and repopulates the visual widgets, which is a quick way to sanity-check it.
- Copy JSON — copies the document to your clipboard so you can share a rule or move it to another Budget instance.
Note: Category and account IDs in the JSON are specific to the instance the rule came from. When you paste a rule into a different instance, point those IDs at the matching categories/accounts there (or set them in the Builder afterwards).
Exporting and importing all rules#
The Export button at the top of the Rules page downloads all your rules as a single JSON file (budget-rules-<date>.json) — a quick backup, or a way to move your whole rule set elsewhere. Rules shared with you by others are not included (they belong to their owner). Your rules are also included automatically in a full data export if you'd rather move everything at once.
The Import button reads such a file back in and creates the rules. It accepts an exported file or a bare list of rules. A rule that references a category or account which doesn't exist on this instance is rejected and reported (so nothing is silently mis-filed) — after importing, fix those references in the Builder or JSON editor. Import adds rules; it never overwrites or removes existing ones, so re-importing the same file makes duplicates.
Sharing Rules#
Rules can be shared with other Nextcloud users you already share your budget with. In the Sharing page, open a share's Configure panel and pick which rules to share, at read-only or read/write permission.
A rule shared with you shows a "Shared" badge on the Rules page. You can run it, and with write permission edit it (edits affect the owner and every recipient — it's one rule, not a copy); only the owner can delete it. Shared rules also run during your own imports. See Sharing for how a shared rule's set category / set account actions behave for the recipient.
Related Features#
- Import — rules are applied automatically during the import process
- Transactions — rules modify transaction fields
- Categories — the most common rule action is setting a category
- Tags — rules can add tags from your configured tag sets
Settings#
- Auto-apply import rules — toggle whether rules run automatically on new imports (on/off). When disabled, you must run rules manually.